A step by step tutorial for carving a bow drill in the field and getting a fire by friction. When I was learning how to make a bow drill fire set I struggled a lot. It took me many weeks to finally make a proper set and get a coal. I’m sure I’ve made almost every mistake that one can do. I never had someone instruct me; I read, watched videos, and practised, a lot. The first time I started a bow drill fire was incredible.
I’ve learned many tips and tricks from research and practice. There is no substitute for getting out there, trying different woods, and improving your technique, but hopefully you will find this guide helpful.
You’ll need:
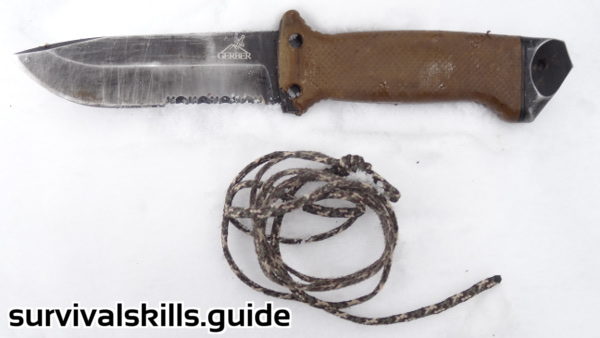
Fixed blade knife.
For making a bow drill fire I prefer my heavy, LMF II survival knife because it’s better for batoning. I use it like a small hatchet all the time when carving a bow drill, so the heavier your knife is, the faster the process.
Strong cord.
The cord should be one and a half to twice the length between you fingers and your armpit. 550 Paracord is best because it last longer than other types of cord. Traditionally
Making a bow drill fire is not as hard as you would think once you have the right materials and technique. But that’s is the crux, having the right materials is not as easy as it sounds when you’re starting out, and learning how to troubleshoot your technique and adjust your set takes practice.
This article is focused on making a bow drill kit in the field, because that is probably the eventual goal. Starting a fire with a ready made kit shouldn’t be as hard, but I think the fun and satisfaction comes from being outside, gathering materials, carving a kit, and getting a fire that same day.
Only with right materials and right technique you’ll get a fire; you can’t cut any corners. I can’t stress this enough. Only with right materials and right technique you’ll get a fire.
Right Materials: choosing wood for you bow drill set
Below is a list of types of woods recommended for making a bow drill base (hearth) and spindle (drill).
But don’t get too fixated with the types of woods.
Learning to identify the trees makes me appreciate the forest more anyways. Experiment with dry, soft woods from your area. Many times I’ve collected spindles or boards from a recommended wood, yet the wood hasn’t been dry and/or soft enough. It really depends on each individual stick. But knowing the type of wood can narrow down where to look for your board and drill.
Some recommended woods:
| Cedar | Willow | Poplar | Balsam Fir | Aspen |
| Yucca | Sotol | Basswood | Lodgepole Pine | White Pine |
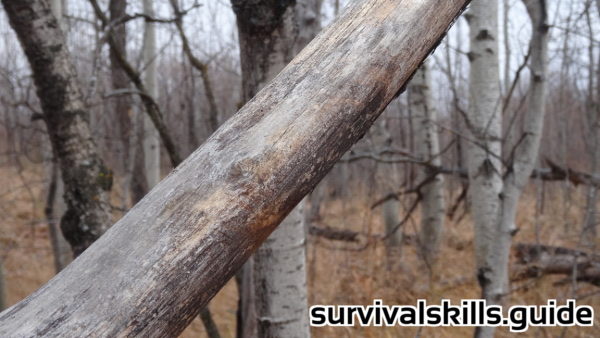
Dry wood
For the spindle and hearth you’ll need to find soft, dry wood.
Your best bet is to find standing wood (the further away from the ground the better) that has been long death and now is fully dry. I tend to use wood from the main trunk rather than from branches. The hearth should be at least two fingers wide or twice as wide as the spindle’s diameter. Look for wood without bark, for bark keeps moisture trapped. Sun exposed areas are a good place to find dry wood.
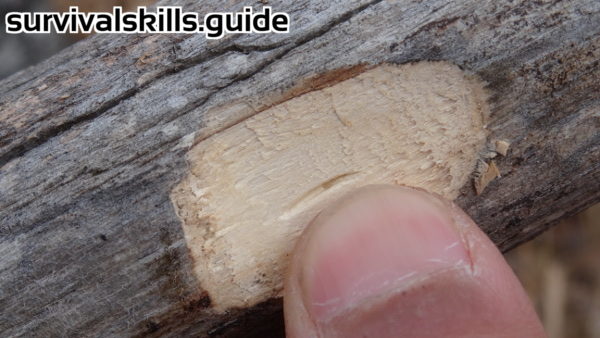
Soft wood
Once you’ve found a potential piece of dry wood you must check if it’s soft. Different woods are softer than others, but the type of wood is not a guarantee that it is the right material. It needs to be in a state of decomposition that it is soft enough to produce a fuzzy powder when drilling it, yet hard enough not to crumble.
The thumbnail test allows you to check how hard the wood is. Carve a small section with your knife and press your thumbnail against the wood. If your finger leaves a depression in the wood, it’s too soft. If your thumbnail barely leaves a mark or it is very hard to leave a mark, the wood could be too hard.
I find the best wood to be easy to mark with my thumbnail.
Many times during my early attempts I have done the thumbnail test and unsuccessfully tried to do a bow drill even if it was hard to mark my nail in it. Don’t do this. Don’t cut any corners. Look for softer wood, it will make it way easier and more likely that you’ll get a fire.
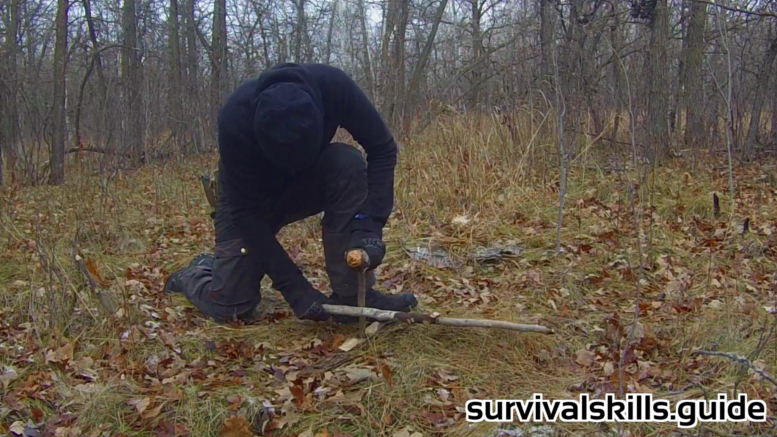
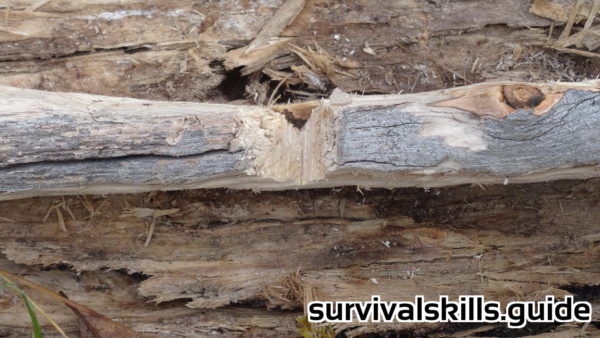
Once you find soft and dry wood you must cut the pieces for your bow drill drill. It’s a good idea to use the same piece of wood for your board and spindle for simplicity. Another option is to look for another piece of wood that is from the same species and is as soft as your board/spindle.
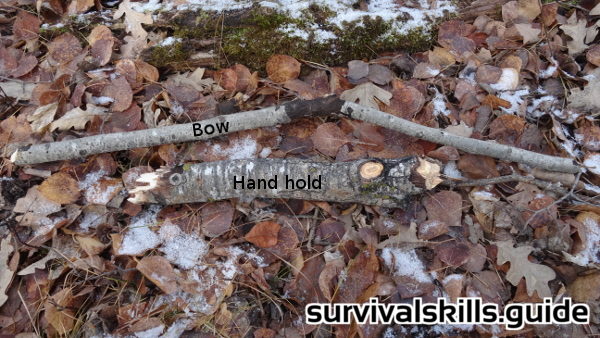
Board
The wood for the base should be two fingers wide by at least a foot long.
I like to use a heavy knife to quickly flatten the board. You don’t have to flatten the entire top of the board, just flatten the top part where you’ll be drilling. I do flatten most of the bottom of the board for stability. At the most the board should end up as thick as your spindle; around half an inch (12mm) thick is good.
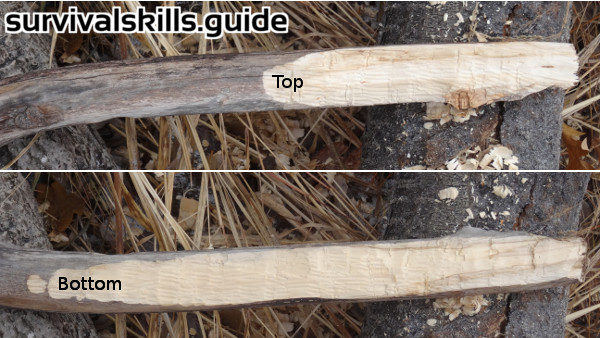
Carve a small guiding hole with your knife.
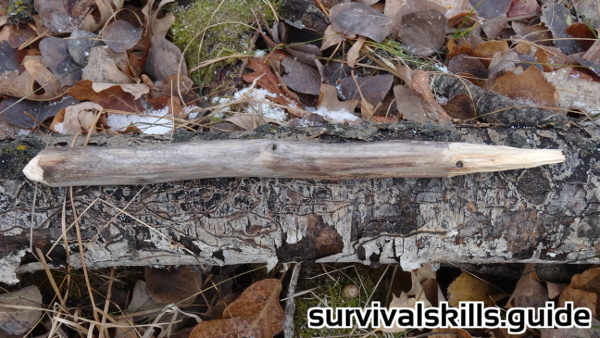
Spindle
The diameter of the drill can be as wide as your finger or thumb. Try to find the straightest piece possible for your drill. I cut the spindle as long as my foot.
Almost everyone I’ve seen uses a short spindle, maybe they’ve worn it down… It shortens quickly.
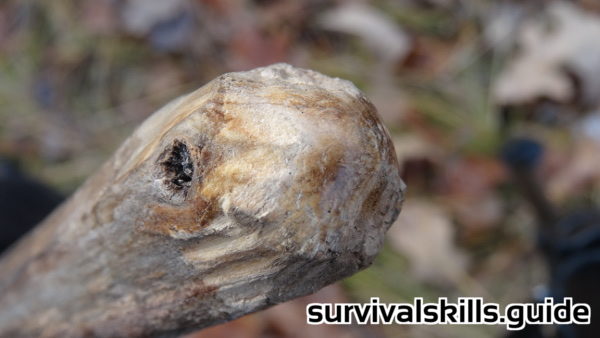
Having a longer spindle allows me to have a more comfortable position that also makes the spindle easier to control, press down, and hold in the same place. Carve the softest end of the spindle to give it a rough round shape, then carve the other end to a point, so as to reduce friction. Keep your board and spindle off the ground otherwise it will absorb moisture.
An optional trick I’ve learned is that if necessary you can increase the purchase of your cord by carving the spindle more squared. But this stresses the cord and spindle, so I rarely use it.
Handhold
Many people recommend using a rock, an antler, a shell, hard wood etc. as the hand hold for the drill.
I go with green, hard wood. Because I can always find wood in the field.
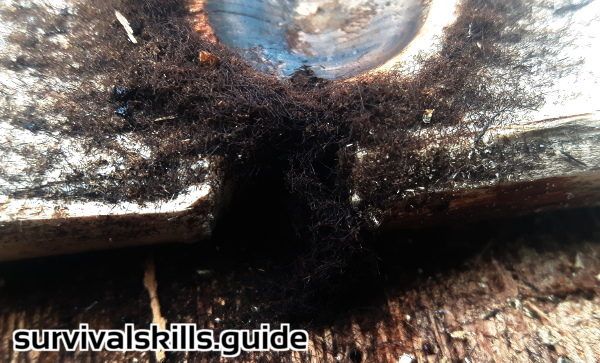
If I can’t find hardwood, sometimes I still make it work with the hardest wood I can find. The big, heavy hand hold helps me keep pressure on the spindle, and use my body weight. It also keeps the hold more stable. With my knife, I drill a small hole in it for the top end of the spindle. You can also add moss, grease, and leaves etc. to the handhold hole to reduce friction, but the effect wears off almost immediately.
Bow
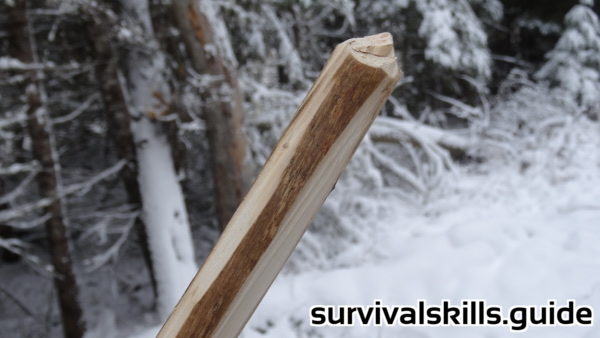
The bow is the easiest piece of wood to find. It should be the same length as the distance between your armpit and your fingertips, and at least as thick as your thumb. If it is too thick it can drain your energy. I avoid flat sticks, and look for sticks with a slight curve, enough to keep the bow out of the way when drilling. It should be strong and sturdy.
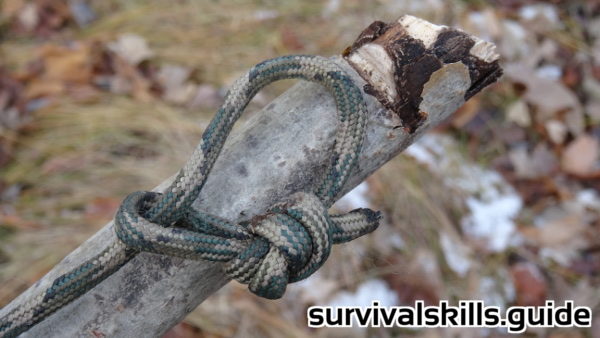
I make a small cut in one of the ends of the bow. Then I loop the end of my paracord and tie an overhand knot unto itself.
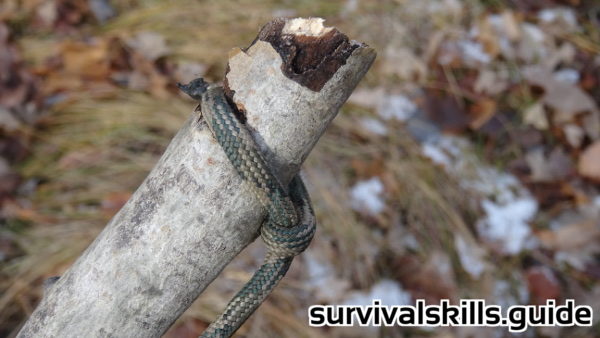
I pass the paracord through the noose and secure it to the bow. The reason why I’m showing you how to tie the bow is because often I need to adjust how tight the cord is.
Being able to easily adjust the tightness of the rope is very important.
As a general rule the cord should be straight, but not very tight when first securing it to the bow. If your cord slips when drilling with pressure then it needs to be tighter.
Tinder Bundle
I like to make my bow drill tinder bundles with three or four layers of different materials. For the bottom layer I gather thin kindling, red pine needles are better but thin twigs work as well. This layer of kindling keeps the tinder bundle off the snow and the ground’s moisture. You can skip this layer in hot, dry climates.
The second layer is made of thin, fibrous tinder, and is very similar to a bird’s nest. I generally use dry grass, inner fibrous bark, or paper-thin, shredded birch bark. This layer must easily catch on fire with the heat from the coal.
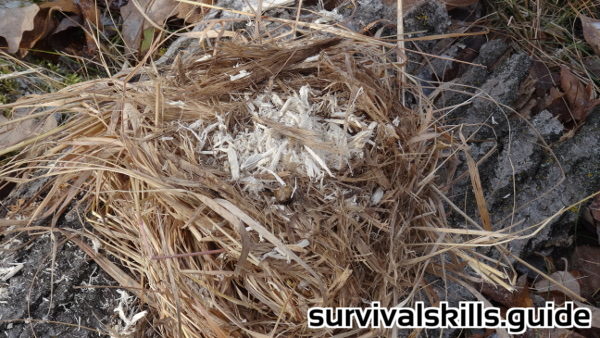
Grass, shredded inner bark, and punkwood
The third and innermost layer, where you’ll place your coal or ember, plays the role of coal extender. Punk wood is my go-to. I rub soft pieces of it in my hands to turn it it into a fuzzy powder. I keep adding punkwood until there’s a small “nest” for the coal. The dry punkwood powder will stick to a glowing ember and make it bigger, increasing your chances of success.

Red pine needles, shredded inner bark, birch, and punk wood
Bow Drill Technique
If your strong hand is the right hand, then follow this instructions (do the reverse if you’re left-handed).
To drill, you’ll need to kneel with your right knee under your center of gravity and with your left foot stepping on the board.
Holding the bottom of the drill (widest) away from you, wrap the cord around it. If the cord is very tight, try rotating the spindle while wrapping it. When the cord is wrapped once around the spindle, the end of the bow towards you should be higher than the other end.
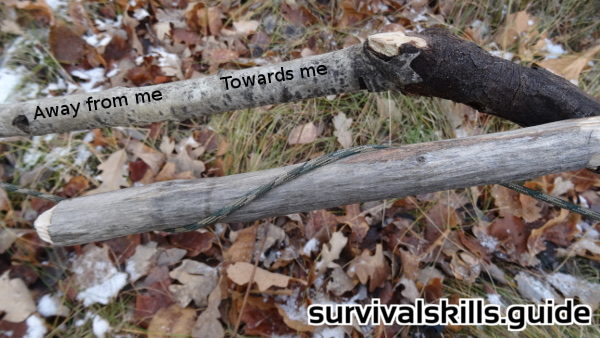
And the spindle should be in the outside of the bow rather than the inside.
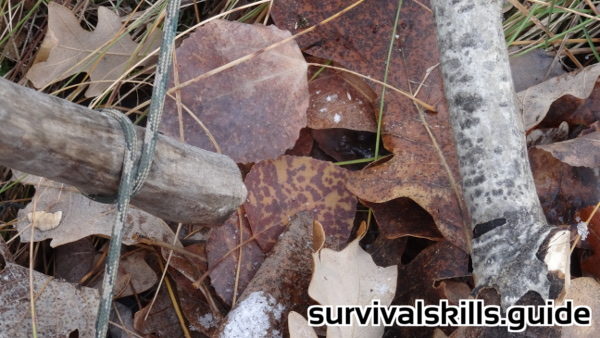
When using the bow drill, you should keep a barrier between the board and the ground, this is where the coal will stay once you finish drilling. You can use a layer of birch bark, tree bark, a stick, or a big leaf. The more moisture there is in the ground, the thicker this layer should be.
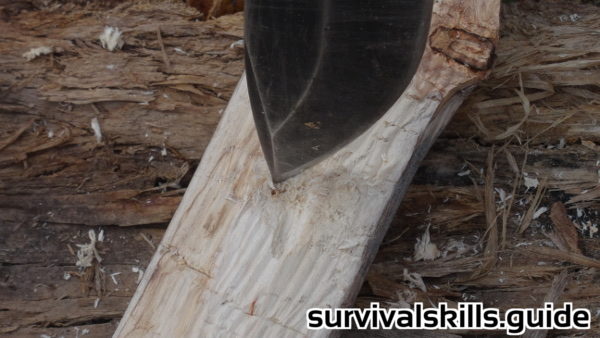
The first step is to drill the board. This helps the drill stay in place once you’ve carved a notch; It doesn’t need to be too deep, just remember you don’t want your spindle to go toward the edge of the board. Don’t waste your energy here, do it slowly.
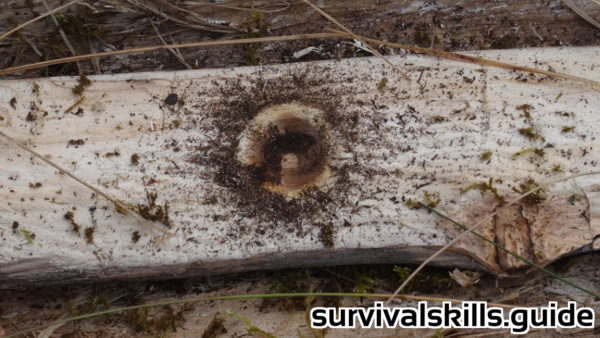
The next step is to carve a V notch, where the coal will form. Try to cut the notch as if you were cutting a ⅛ slice of pie. Although stay a mm or two from the center, otherwise the spindle might pop out.
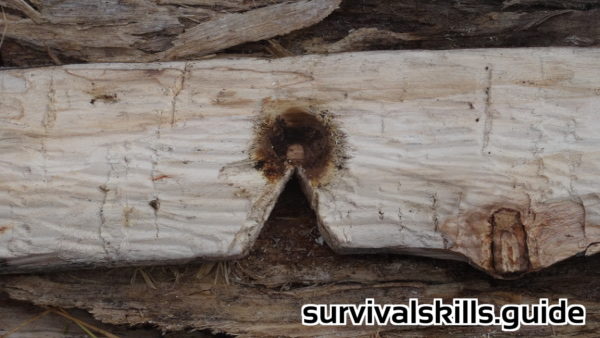
Cut the notch evenly all the way.
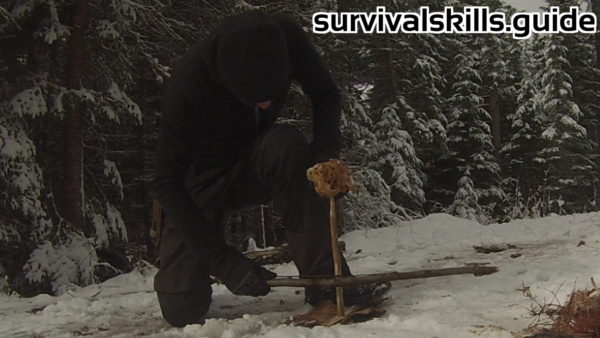
Start a Bow Drill Fire
Before beginning to drill, make sure your tinder bundle is nearby. I often use my knife to carve the pointed end of the spindle a little thinner.
Drill slowly at first to build up some powder inside the notch, and dry out any remaining moisture in the base. Try to use the entire length of the bow, so do full swings. Once the notch is almost full with powder and the base and spindle are smoking you should gradually increase the pressure and speed.
I usually keep drilling until I can’t continue, or stop if I notice that a smoldering coal has detached from the notch.

Once you have a coal that is still smoking after having stopped drilling, you can take a well deserved rest. Take your time to gather your tinder bundle, the coal will still be smoking for a few minutes.
Using your knife carefully place the coal over the punkwood in your tinder bundle. Without disrupting the coal, wrap the fine tinder over it and start blowing gradually and steadily. I like to move the tinder bundle in the air between breaths. The coal and tinder should start to glow, just keep blowing steadily until the tinder catches on fire.
Here is an uncut video of my third attempt with the bow drill set I had made minutes before.
This is another Youtube video by Stay Primitive that I recommend watching:
Troubleshooting your Bow Drill Set
If the drill makes a whistling sound or gets polished there are three things you can do, either you keep drilling with more pressure (might not work), drop a few grains of sand in the hole of the base, or use your knife to remove the layer of polished wood.
Check the Powder
This powder is very black but it has formed rolls, which is not good. Increasing pressure might help get a fuzzy consistency instead. If you can’t get the right powder try finding softer and dryer wood.
If the powder is light brown you need to increase the speed. If it is brown and dusty you should increase the speed and pressure as well.
The perfect powder is black and sticks together.
If you are drilling fast, with pressure, and can’t get a coal, try checking your set:
Is the Wood soft enough? Do a thumbnail test.
Cord slipping? Tighten it.
Spindle popping out of the notch? Make a new hole and notch, maybe try making the notch smaller this time. And keep the base stable and horizontal.
Hand hold smoking? You can lubricate the hand hold, and/or decrease the diameter of the top of the spindle. Consider getting green, hard wood for the hand hold.
Not enough speed and pressure? Try a thinner spindle or carve the bottom part of the spindle thinner.
Final Bow Drill Advice,
I continually adjust my set when I’m not getting a coal. But if after all these adjustments you are still struggling, get a new set.
The most important lesson for the bow drill is only with right materials and right technique you’ll get a fire. If you are struggling to get a coal, there is something wrong. Don’t keep doing the same thing, change your technique, adjust your set, and/or get better wood.
Keep practicing with different sets, and you’ll learn what the right materials and right technique are. Have fun!
If you liked this article consider sharing it or buying through my affiliate links (I get a small commision, but it doesn’t affect the price).