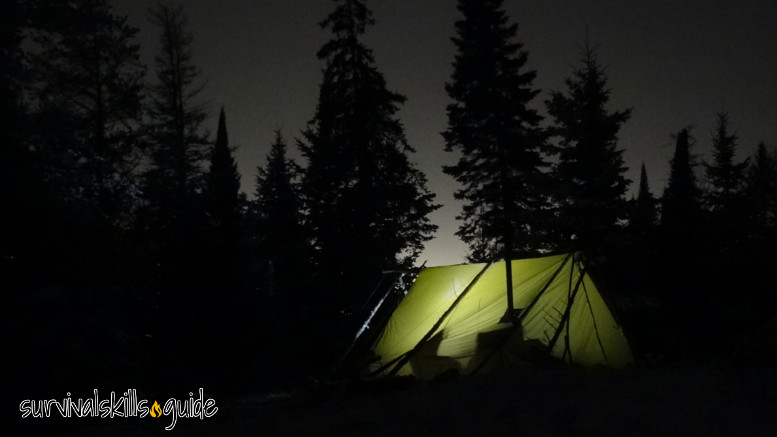
I wanted a lightweight hot tent that could be used for a long term winter camp. But none of the tents in the market fulfilled my requirements. So I decided to make my own tent.
The tent needed to have a big window, and an A-frame capable of supporting lots of weight. That way I could add poles, pine boughs, and snow to the roof for added insulation in a long term scenario. That ruled out the tipi tent design.
I’ve been in a silnylon “hot tent” and a traditonal canvas tent, and I wanted to make my own lightweight tent.. I used the dimensions from a snowtrekker tent as a foundation. One thing that I noticed in the snowtrekker tent is that the door is difficult to open and close, so I changed the door to have the design of modern camping tents.
I knew I wanted a wall tent with short walls (cozy but comfortable). Being able to stand up and hang stuff to dry from the roof is another must for a long term winter shelter.
I also wanted windows and a liner for added insulation and less condensation.
Needless to say, you’ll need a sewing machine to make a tent.
So don’t keep reading if you don’t have one (it might make you want to buy one).
To make a 3D sketch of the tent I used Sketchup Free. The app can be confusing at first so I’ve added some animations to help you get started.
It all starts with a rectangle.
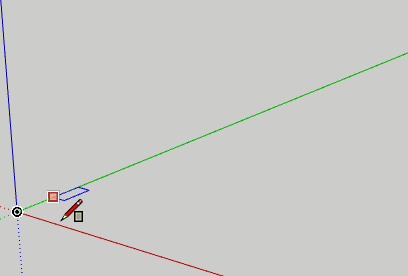
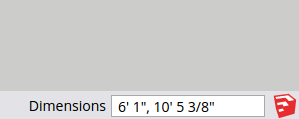
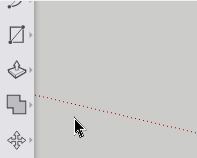
Draw the rectangle on the ground and type your dimensions before you release the mouse see below, then press enter. Specify the unit (‘ or ” for instance) and type a comma between length and width (bottom right).
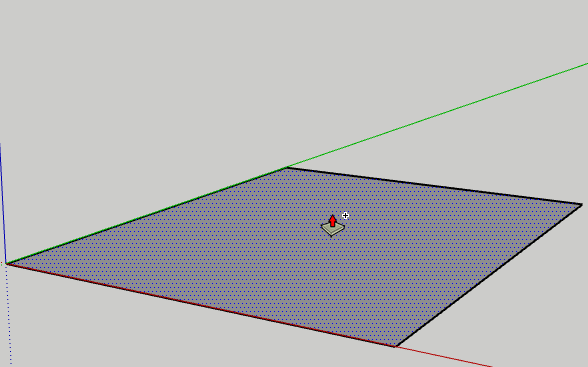
Once your square is the right dimensions, select the Push/Pull tool.
The push/pull tool allows you to specify the height the same way you specified the dimensions of the rectangle.
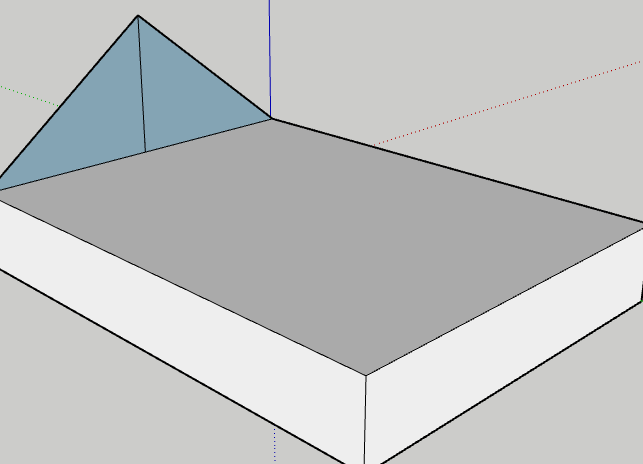
Now select the line tool. Draw a line from the midpoint with your desired ridgeline height. Then connect the shortwalls to the ridgeline.

Choose a different view to see the other side of the tent.
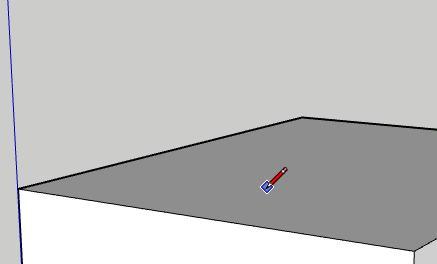
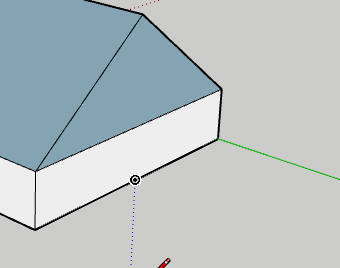
Use the eraser tool and push/pull tool to erase the mid line of the back of the tent and form the tent shape (type the length of the tent before you release the mouse).
Once you get the hang of it you can experiment with different shapes and ideas.
When you’ve settled on a prototype use the dimensions tool to show the dimensions of each piece of fabric.
Sketchup makes it easier to add “components” to your sketch to check if the dimensions would work. It’s a neat program that allows you to design a pyramid tent, wall tent or anything you can imagine.
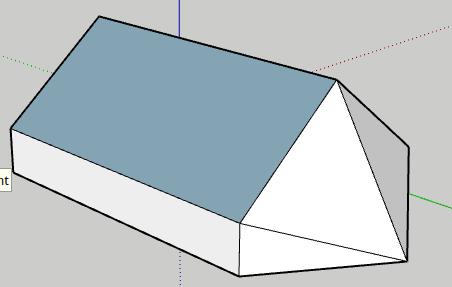
This is my design:
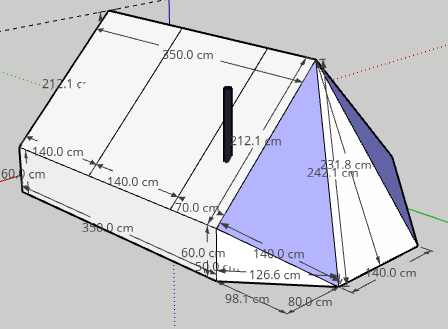
I’ve added lines to the top of the tent where the seams of the material will be (I checked the length of the fabric minus excess fabric for the seams). It’s good to keep in mind the dimensions of the fabric you have in mind when designing your tent.
I drew the parts of the tent on a piece of paper to calculate how much fabric I would need.
Materials for the tent
24 yd 1.6 oz waterproof silnylon
#8 coil zippers and sliders,
1ft stove jack material,
universal needles (90/14),
I also bought sewing clips as better alternative to pins.
This DIY wall tent wrap up on RipStopByTheRoll was helpful.
I encourage you to buy extra fabric, to practice the settings on your sewing machine. Silnylon is super slippery.
I decided to make a scale model of the tent to practice my seams and help me make small adjustments (I used cheaper nylon fabric). Since this is my first sewing project.
Image of model
The next step was to transfer my design to the fabric.
Many canvas tents are used with a waterproof tarp on top, so I wanted to experiment with a sil-nylon tent that has a radiation reflecting liner.